

Inventor 101 Extra Credit – Customizations
Are you aware you can customize Inventor’s User Interface (UI) as well as your keyboard & mouse selections?
I hate to say it but I see a lot of users not taking advantage of this ability.
Inventor does come with some shortcuts preset. Most commonly known are the F or “function” keys, but you are more than welcome to customize them to your liking.
Menus – All menus can also be undocked and moved to a second screen, leaving the entire screen for Inventor’s graphics. You can also customize the Heads-up display menu.
Section 1 – The Application Options menu
So, with the Application Options menu (Tools > Application Options), you can customize the….application to the way you prefer. Here you have settings that will set the way Inventor reacts and acts during your daily interactions. Without going into ALL the possibilities, let’s hit on a few key ones here. Feel free to go through each of the tabs on the menu and adjust the items that are important to you and ones that’ll make your Inventor CAD life a bit faster and easier.

· General Tab
o User Name: This is your user name, or the name that you desire to have listed as the Author of your drawings & models based on the originator/creator of the file. Set this according to your company standards for the drawing title block if your CAD Administrator hasn’t.
o Undo File Size (MB)
This defaults to 1G and that is typically enough for most users, but if you deal with large or complicated files, set this higher to about 2000 to 3000 MB (2 to 3G), max is 4000. What this does is gives you more memory to undo more steps/commands.
o Selection
This is a very important setting as it sets the delay time for the “Select Other” option and how close your mouse needs to be to the entity for selection. I have this set to 0.3 seconds and the “Locate Tolerance” to 7. Setting this to a quicker delay can really help with your speed and flow when working in models and assemblies, especially when working with constraints.
o Home
Another huge time saver – Decide if you want to use the Home page on Startup or not by the check box. If you do use Home, set the Maximum Number of Recent Documents set to a small number. This defaults to 50, I typically set it to show just 10. This speeds up the startup process as it limits Inventor having to generate and refresh the recent file thumbnails
· Colors Tab
o This is where you can set the Theme, Color Scheme and Background to your personal liking. Note: the highlighted entity colors change based on the color scheme.
· Display Tab
o Here you can set the Zoom behavior, whether it zooms to the cursor, or zooms away like Autocad.
o You can also set how the View Cube/Steering Wheels location, look and size among other settings.
· Drawing Tab
o Set “Edit Dimension when Created” – good time saver, less clicks/steps
o Default Drawing File Type - .dwg or .idw
Personally I set this to .dwg to take advantage of Inventor’s Autocad interoperability options.
· Assembly Tab
o “Place and Ground First Component at Origin” – set this based on how you prefer to build your assemblies. Personally, I have this active. If and when I need to unground that first component, I’ll do it as needed instead of always having to manually ground such each time I start a new assembly. Again, personal preference.
Check the other tabs for any possible settings that may work better for you. Your CAD Administrator can set the more common options based on company standards and then export/import these to all users.
Section 2 – Ribbon Menus
One of the customization options users seem to overlook is what can be done with the Ribbon & Panel menus.
To undock the Ribbon, right-click the Ribbon and select “Undock”.
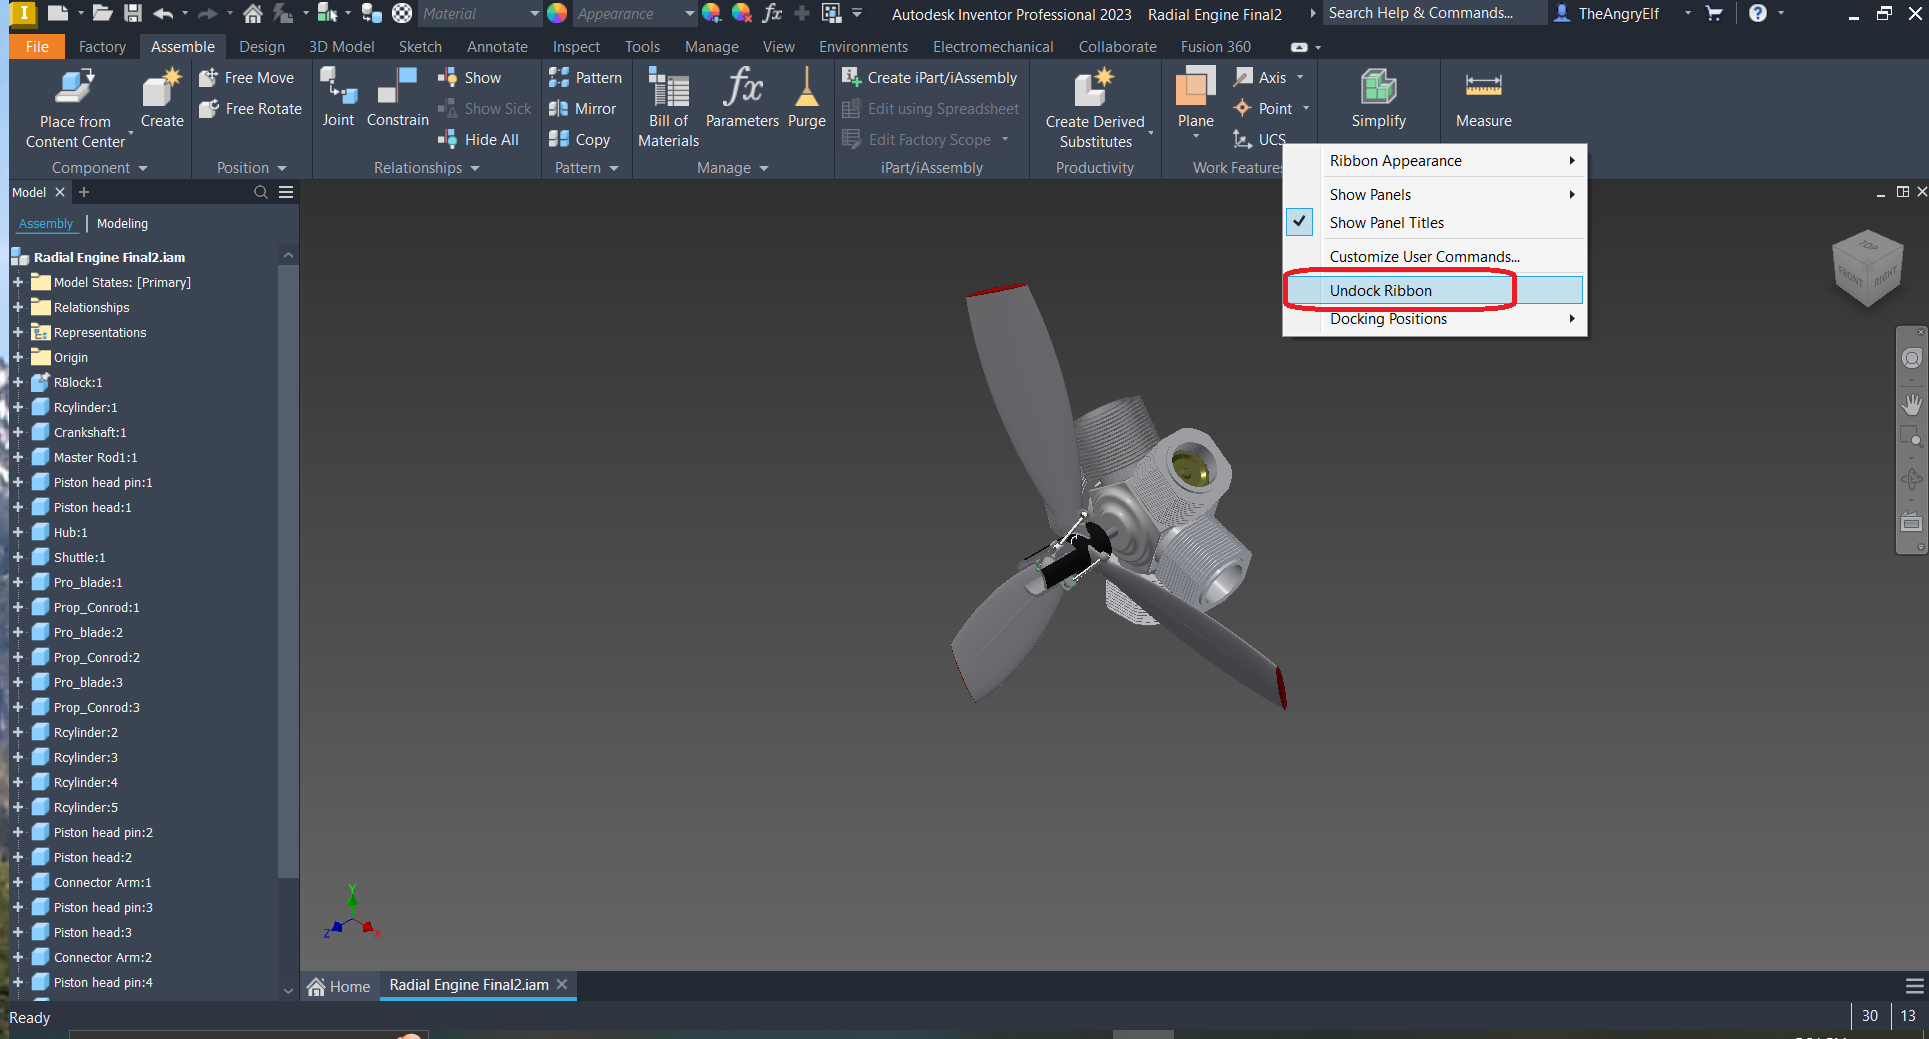
To set the location of the Ribbon, right-click as above and select the Docking Position pull-down and select from “Top” (default), “Left” or “Right” (see below)
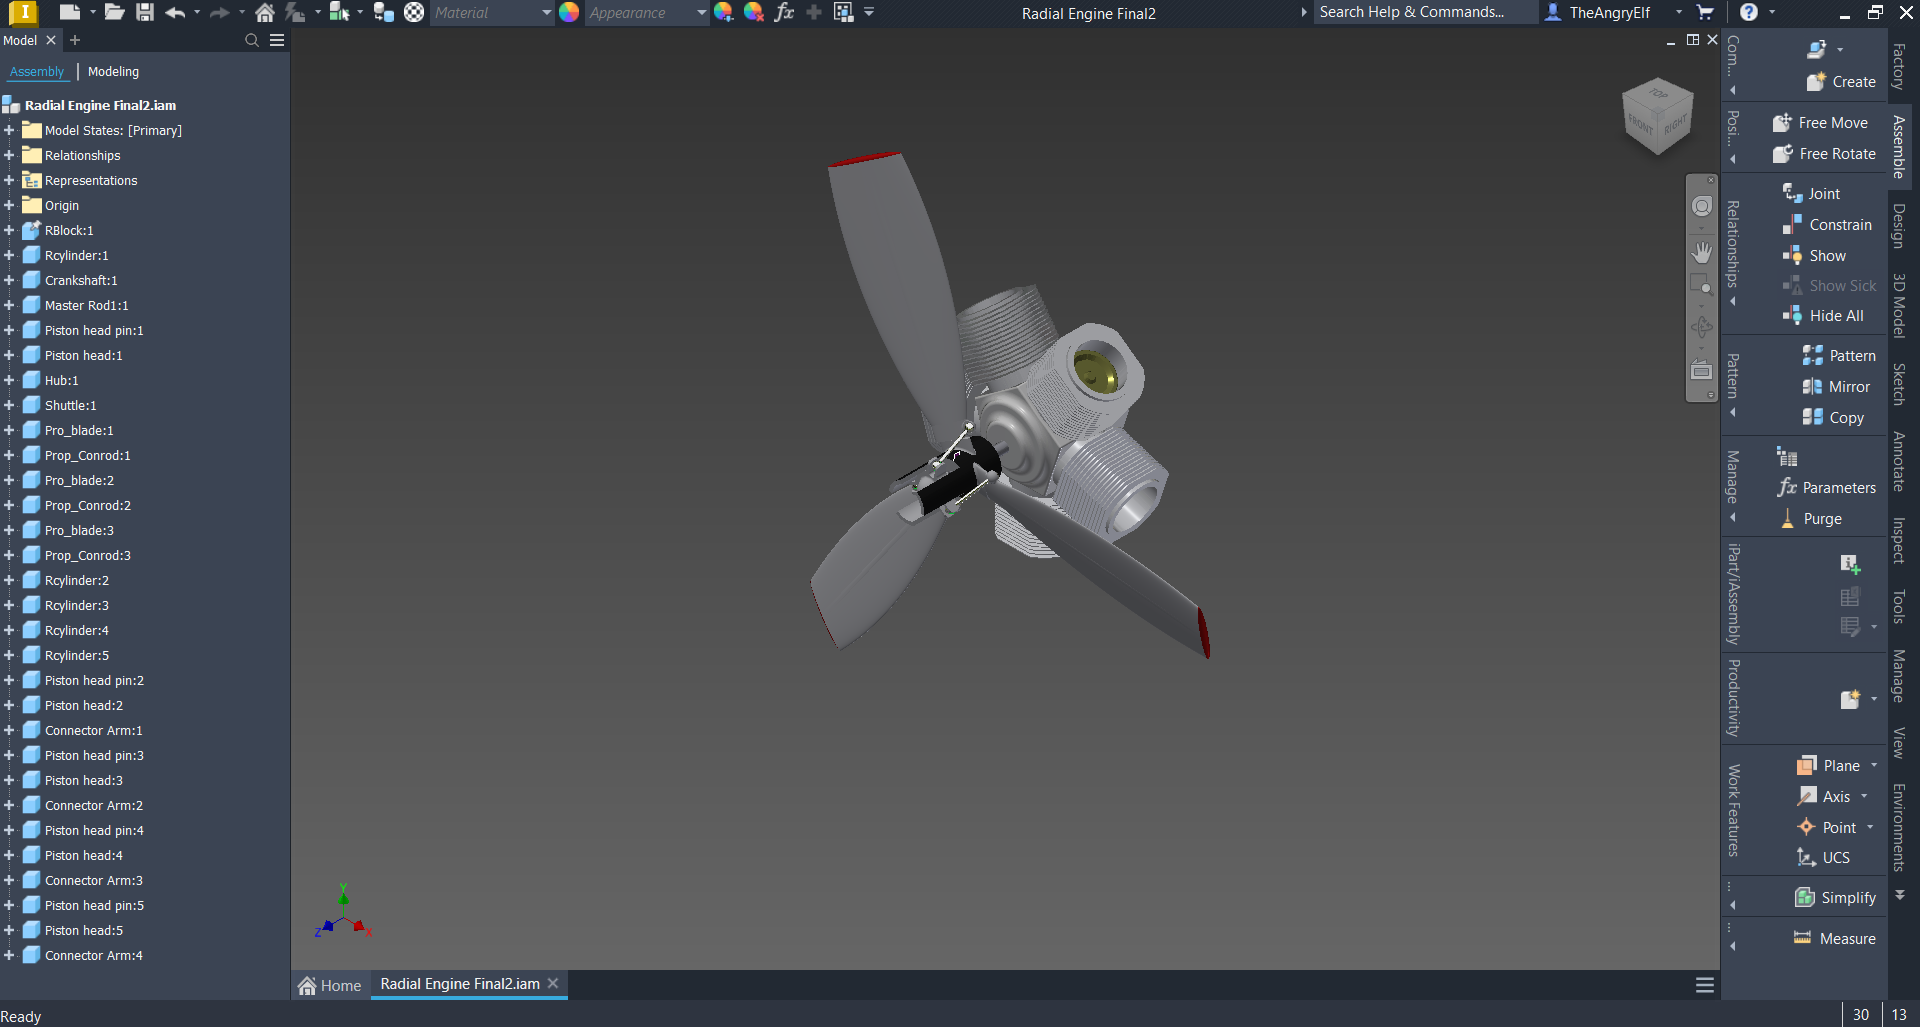
Left Docked:

Right Docked:
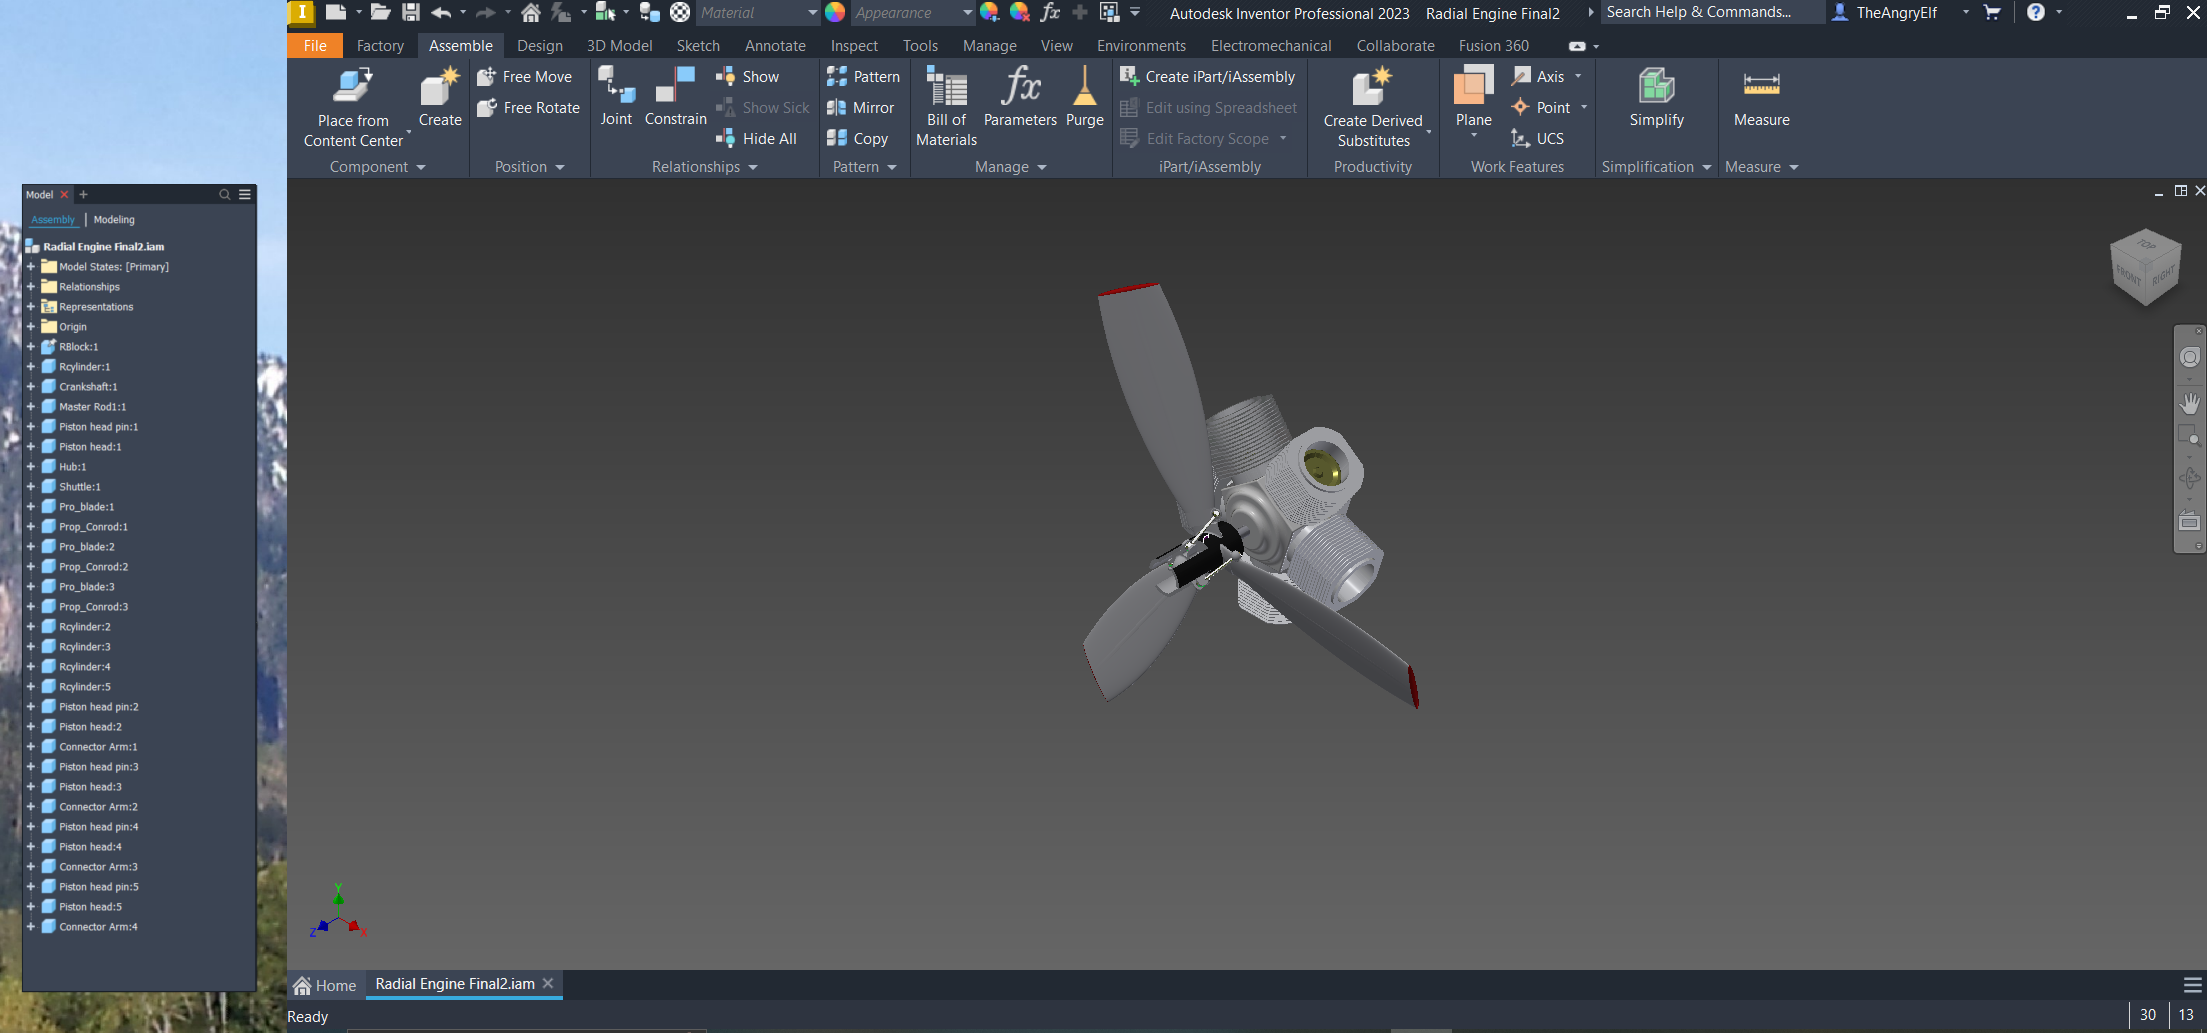
If you use multiple monitors, these menus can be undocked and moved to a secondary monitor, leaving more room for the main graphics window to work in. (the following screen cap is over 2 monitors)
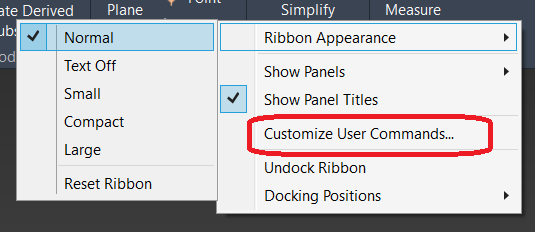
You can also select the Ribbon Appearance to show or hide the text as well as the size of the ribbon icons:
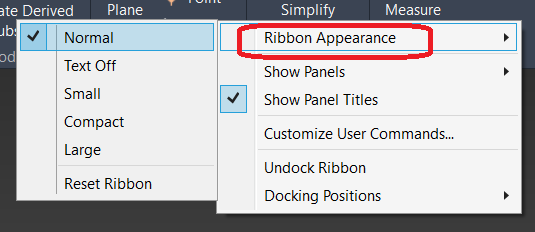
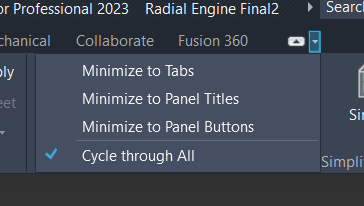
Selecting the “up arrow” icon or the “down arrow” to the right of it, you can select to minimize the Tabs, Panel Titles and Panel Buttons as well as restoring them back to the default by cycling through the selections.


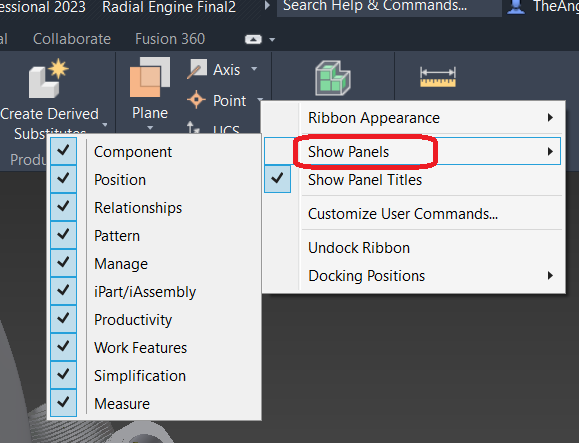
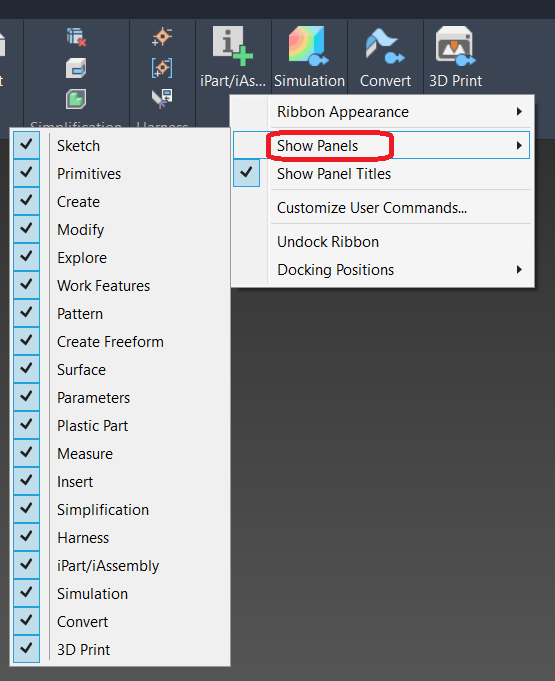
Panel Menu – You can also select the Panels shown on the Ribbon. This changes based on the environment you have active (Part/Assembly/etc). This allows you to select the panels you use as well as deselect the panels you don’t. If you don’t do any mold design or surfacing, why have those panels on your ribbon? Deselect what you don’t use and de-clutter your ribbon menu.
Section 3 – Keyboard
This subject always brings up a memory that to this day, still floors me. In short, I had an engineer who was literally demanding Autodesk not only have the keyboard pre-customized, but customized to HIS liking. Yes, he wanted Inventor shipped with HIS shortcuts. He didn’t want to spend the time doing it himself, he wanted it all done for him.
Out-of-the-box, Inventor has the following shortcuts pre-set. Of course, you can not only change these, but you can create your own as well.

Instead of going through all the details here, I’m going to cheat a bit and send you to the Autodesk link on the process:
https://www.autodesk.com/shortcuts/inventor
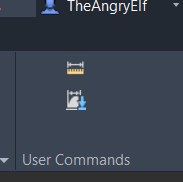
Section 4 – User Commands
Back in Section 2 – Ribbon Menus, you may have noticed in the pop-up menu shown below, a “Customize User Commands…” selection.

Selecting this brings up the following pop-up menu:

Here, you’ll see 3 tabs, Ribbon; Keyboard and Marking Menu.
The Ribbon tab gives you the ability to add a custom panel of your more common commands in one place. This “User Commands” panel can contain any desired command and each tab can have a user command panel tailored to your specific needs.
The process:
Step 1 – Select the tab for which you want to add your custom panel to. Right click and select the “Customize User Commands…” option:
Step 2 – In the pop-up menu, select the commands you desire for the new custom panel in the Left hand column, then select the “Add >>” button in the middle. This then lists those in the Right panel which will then show in the custom panel on the ribbon.
Commands to select from can be filtered by selecting the “Choose commands from:” pull down.

The order of the commands can be changed after being added to the Right side panel by selecting the up/down arrows.
You can also select the options of showing the icons as “Large” and or listing its “Text” by selecting the appropriate check boxes

Step 3 - Once you have all the commands you desire for this panel, select “OK” to set and close the menu, or “Apply” to set and leave the menu open to continue customizing.
Keep in mind to only add commands that correlate with or make sense on that specific Tab. For example, I like to have the Render command available for when I’m in an assembly.
You can also change the location of the User Command panel by dragging it on the Ribbon menu to where you’d prefer it to be.
Step 4 – Once you have everything the way you like it, use the “Export…” button to save the setup to a safe place. Use the “Import…” button to share or reload these settings.
Keyboard Tab shows the customized keys and keystrokes with their command name and type (alias or shortcut) and the Category for which they apply.

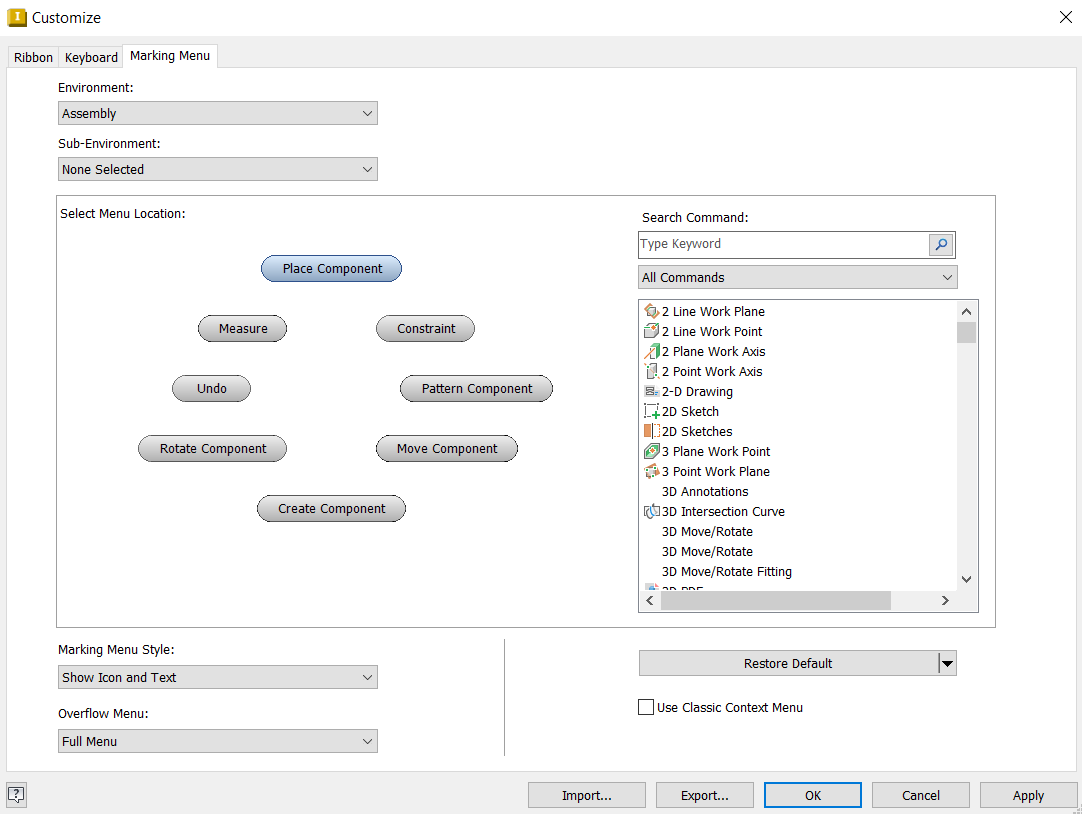
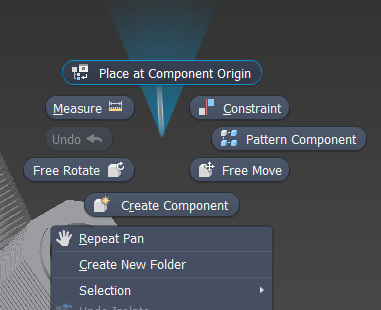
On the Marking Menu tab, you can customize the commands and their location on the Marking Menu pop-up. Here you can move lesser-used commands to the Overflow menu as well.
The Process:
Let’s say I want to replace the “Place Component” bubble with the “Place at Component Origin”.
Step 1 – Select the “place Component” bubble.
Step 2 – Select the “Place at Component Origin” command in the list to the right.
Step 3 – Select “OK” or “Apply”

See what works for you, you can always reset back to factory default or change/update as you please. Customize to make your daily routines go quicker. Even simple tasks that you perform multiple times can add up over the course of your day/week/month/year. Customize such to minimize that time as best you can.